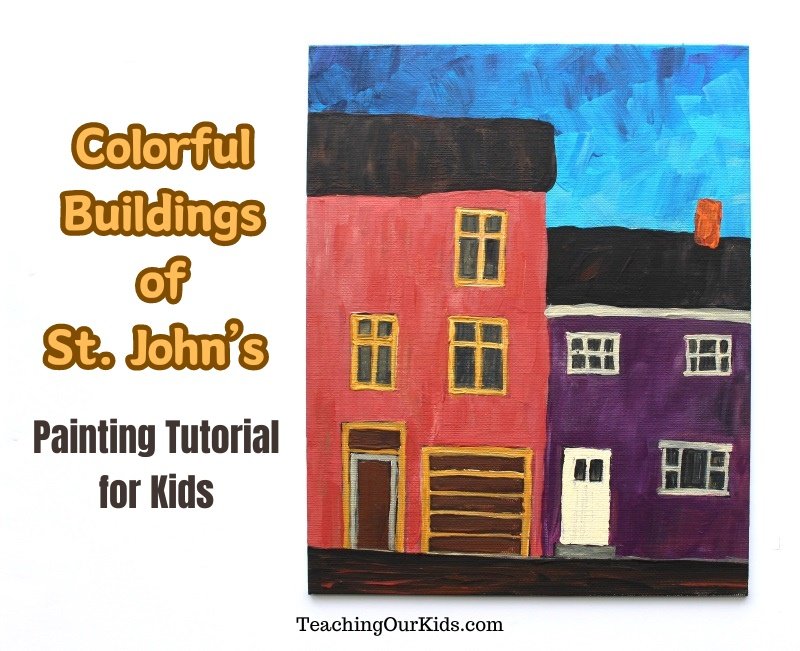
Colorful buildings of St. John’s Newfoundland, Canada are indeed colorful and full of amazing history. Did you ever wonder why the buildings are so colorful? Is it just for fun or is there a special reason to paint the whole town in beautiful bright colors?
Legend has it the houses are painted this way so that when sailors came back from the fishing grounds, all they had to do was look up to find their home shining in the hills – as bright as a beacon for eyes blurred by the sea.
http://www.broaderpalette.ca/jellybeanrow
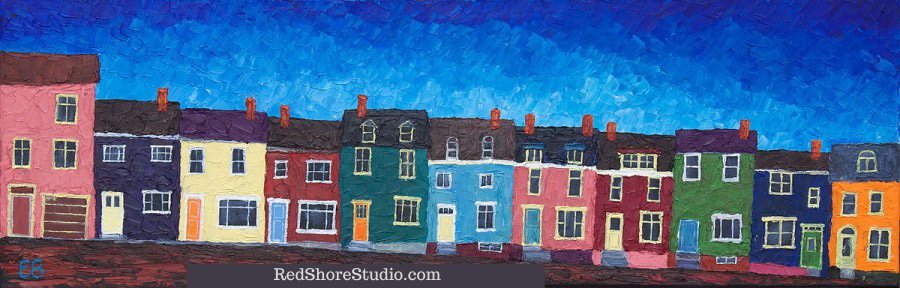
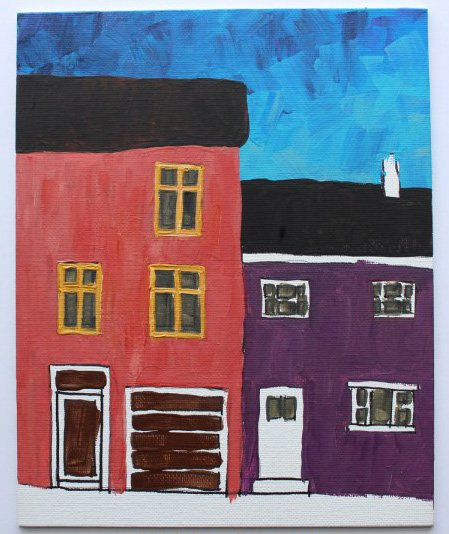
Today, I will show you how to paint a small section of the above painting with acrylic paint. The painting will be similar but will not have the same type of texture as you would get using oil paints and a palette knife. However, I believe we will have tons and tons of fun painting this anyway.
Colorful Buildings of St. John’s Painting Art Tutorial
In today’s tutorial, we are going to paint a section of my painting as shown below.
Supplies you will need for this art project:
- Acrylic paint
- Canvas panel or canvas (8″x11″)
- Brushes
- Plastic/foam plate for the paint
- Jar/cup and water
- Paper towel
- Pencil
- Printable template
If you’re good at sketching, you can skip printing out the template. If not, then follow my flower art tutorial to find out how to copy the drawing onto your canvas panel.

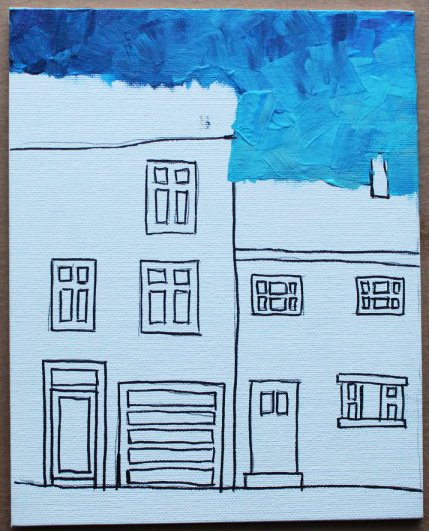
Once you’ve copied the template onto your canvas, choose a light blue color and paint the sky. Don’t worry if you painted over the lines, we will cover that later with another color. We are using acrylic paint and it’s very easy to correct mistakes later on. So no worries!

Choose a darker blue color (dark navy color) and make soft and short brush strokes. Changing brush stroke direction makes it a little more interesting.
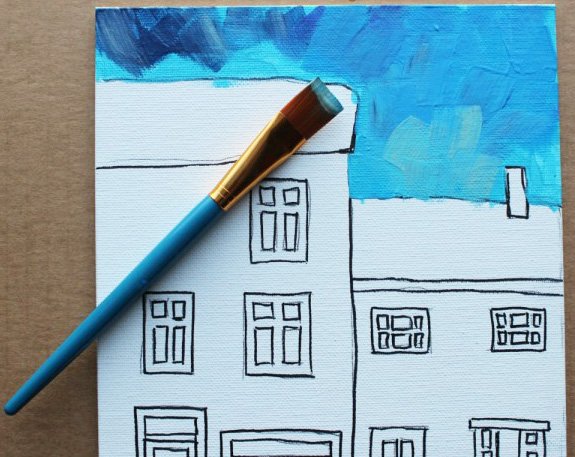
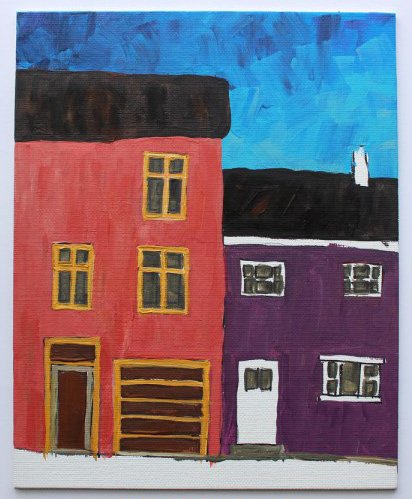
You should now have something like what’s shown in the picture below. Darker blue at the top and lighter blue closer to the second lower roof with the chimney.
Now paint the roofs in black and the window panes in gray. Don’t worry if the windows look messy.

Paint the walls. Choose some bright colors. I chose similar colors to the ones in my original oil painting. Next, paint the window frames a deep yellow, and choose some reddish brown color and paint all the sections as shown in the photo below.
Apply a second thin coat of reddish brown color on top of the black roofs. Take a close look at the photo below. Paint the door frame of the house on the left with some gray paint. Next, paint the frames, but this time use a deep yellow for the garage door and the main door.
Take a close look at the photo below. Add a thin gray layer to the window panes on the right. Next, paint the doorstep and the purple building’s front door.
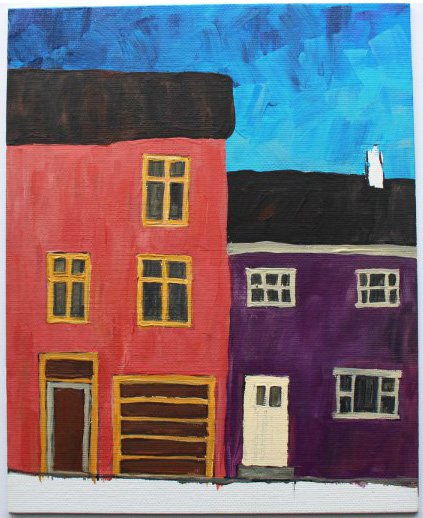
Paint the sidewalk/road in black first, and just like we did for the roof, make light brush strokes in reddish brown color to make it more interesting. Lastly, add some color to the chimney.
I hope you enjoyed this art tutorial! Don’t forget to sign up for our newsletter in the footer below to receive updates whenever we post new tutorials!